
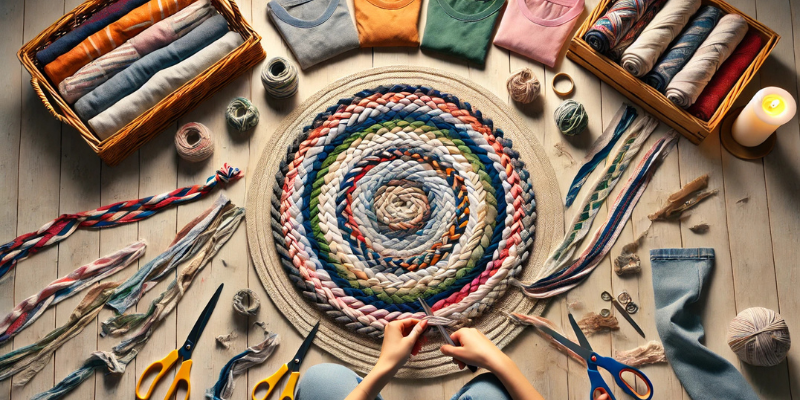
Do you have too many old clothes in your wardrobe? How about making beautiful and handy braided rugs out of them? You will not only make an exceptional homemade decor item, but you will also relish the joy of doing it yourself by making an eco-friendly rug. In this blog article, we will take you through the entire process of turning useless materials into a lovely braided rug that can help beautify any dull area.
Introduction
Transforming unused or old garments into beautiful braided rugs is an innovative approach that helps minimize wastage. Redesigning old clothes that are irreplaceable to you not only helps clean out your wardrobe but also reduces the problem of fabric waste. Furthermore, the nature of this project allows for the addition of personality to a decor item, a feature that is nearly impossible to find in ready-made decor items. Undertakings of this kind are not money-saving alternatives, but rather, they encourage the individual’s imagination as they have room for color and texture variation.
Let us now get down to the step-by-step process of making a braided rug out of old clothes.
1. Gathering Your Materials
Sorting Through Old Clothes: Choosing the Right Fabrics
If you're choosing fabrics for a braided rug, it would be advisable to go for stronger materials and those that do not stretch much such as cotton, denim, and linen. Such fabrics will withstand the braiding well and retain their shape in the long run. Fabrics such as silk and knit which are rather more stretchy or delicate will be difficult to use and will also tend to fray. Keep in mind that matching the clothing patterns and colors will help the rug look more attractive and stylish in the end.
Tools Needed:
The right tools are important as they make the process easy and enjoyable. Collect these basic tools before starting.
- Sharp scissors: A pair of scissors that can easily cut through thick materials
- A ruler or measuring tape to allow for cutting straight and even, uniform strips
- Hand Sewing needle and thread will suffice, or you can use a sewing machine for an express finish.
Additional Materials:
For added durability and to keep your rug from slipping, consider using a rug pad underneath once it's done. You can also use fabric glue to secure the braids as you work, though it's optional.
2. Preparing the Fabric Strips
Cutting the Fabric into Strips: Width and Length Considerations
After selecting your fabrics, start by cutting them into strips. For most braided rugs, aim for strips about 1 to 2 inches wide. The length will vary based on the size of the fabric but try to keep each strip at least 24 inches long. This way, you can make longer braids without needing to stop and add more strips frequently.
Joining the Strips: Sewing or Knotting Techniques
Due to the fact that the strips may not be consistently long enough to form a complete braid you will have to attach shorter pieces with each other. You can either:
- Join two ends together by sewing them with a needle and a thread for a neat, seamless appearance.
- For a natural, handcrafted feel, tie the two ends into a knot.
Tips for Creating Uniform Strips and Minimizing Fraying
or zig-zag scissors instead of the ordinary scissors. If you don't have pinking shears, you can take the fabric strips fold them in the center, and sew along the two open edges making a tubular strip which is less likely to fray. When cutting the strips, you should cut them with their widths at the same size so as to cut down the chances of the braids looking different.
3. Creating the Braids
Basic Braiding Technique: Three-Strand Method
If you are wondering how to braid a fabric strip, the easiest way of doing it is by using the three braid strands. This can be achieved by performing the following steps:
- 1. Take three strips of cloth and place them flat on the surface.
- 2. Start braiding by taking the right strip and placing it over the middle strip. Take the left strip and place it over the new middle strip.
- 3. Keep on braiding till you get to the end and finish off with a knot or a stitch.
Advanced Techniques: Four-Strand or Flat Braids for Variation
If you’re looking to add some variety, try using a four-strand braid or a flat braid technique. These techniques require a bit more practice but result in a thicker, more complex braid that can make your rug look even more unique.
Maintaining Consistency in Tension and Thickness
When braiding a rug, it is important to sustain the tension at all times when performing the braiding process. Be cautious when braiding and do not pull the strands too tight, as this tends to give the braid an unappealing narrow and uneven edge. Try to maintain uniformity in the thickness of the braids all through, as this will simplify the assembling rug together later on.
4. Assembling and Sewing the Rug
Choosing a Starting Point and Braiding Pattern
When you are ready to construct your rug, pick a place to start. Most people find it easier to begin from the middle of the design and work their way out. This approach is ideal for making a round or an oval rug. If you like a rectangular shape you may begin sweeping from one end and braid it in rows.
Sewing the Braids Together: Stitching Techniques and Seam Reinforcement
After you have made up your mind on the shape, now it is your turn to stitch the braids together:
- To begin, take your first braided piece and wind it around in a smaller coil for a round shaped rug, or extend it in a line for rectangular shaped one.
- While making a rug, sew the sides of the braids at the very edge as you progress. Hand stitch or use a sewing machine to attach braid after braid.
- Add extra stitching at regular intervals of a few inches to the seams to make sure the braids do not come off.
Tips for Adjusting the Shape and Size of the Rug as You Progress
Whenever you are stitching together the rug keep checking its dimensions. In case you see the rug starting to ‘puff out in parts’ or bulging, then try to ease your stitches a bit. When making a bigger rug, just add in more braided strips. Extra rows can also be added to the border for more width.
5. Finishing Touches
Trimming Excess Fabric and Stray Threads
When you are finished sewing together all of the braids, assess your rug and cut off any dangling threads or excessive fabric hanging from the edges. This will create a neat finish for your rug.
Securing the Edges: Binding or Folding Techniques
To prevent wear on the edges, you can bind them by either folding the fabric edge inward and stitching it or applying fabric glue to the outer edge. However, for a more natural, country-style look, you might prefer to leave the edges untrimmed.
Washing and Drying the Finished Rug for Optimal Appearance and Durability
Lastly, ensure that you give your rug a soft wash to ensure that it is sparkling clean and fit for use. Since your fabric strips were pre-washed, this shouldn’t cause any shrinkage. To avoid any fraying or damage that might be caused by a dryer, air dry your rug.
Conclusion
Braided rugs made using worn-out garments are an interesting activity you can engage in since they create something beautiful and do not cost anything. You can take your time, be patient, and be imaginative and create a special rug that would fit exactly into any given space. The joy of taking old, used fabrics and turning them into a beautiful piece for the house is what makes it interesting. If you are looking for ready-made braided rugs, visit our website at Homespice.


